I was going to give you a sneak peak at some of the fun Christmas projects we have been working on, but I thought we could take just a second to celebrate Halloween. We just finished some of our “treats” for Saturday and they are crazy cute!I I mean… scary!!

.IMG_2512[1]

We wrapped Hershey bars in muslin and glued on eyes.

IMG_2511[1]

We also made bags of baby mummys. Whaaat?!?!

halloween-craft-ideas

And some humongous black widow  spiders (bagged with white jelly bean “eggs”).

IMG_2510[1]

And of course we have bags of candy, appropriately labeled…

IMG_2509[1]

We have this great gothic Halloween panel with all of these sketchy labels. I just ironed fusible web to the wrong side, then fused them to card stock. How cool to get a bag of “Frog Eggs” and “Dragon Teeth”. Yummy!

We have a few more things to do, then we’re ready for Saturday…. Eeeeek!!

Renew

So…. we haven’t talked for forever. I’m sorry. It was a bad month, then turned into a busy summer, then I just fell out of the habit. I had a medical procedure, a few complications, a daughter’s wedding, a death in the family, a magazine article featuring the shop, a new location for the retreat house (selling one house, buying another, remodeling, decorating, all in a period of two months…), and this month, my husband hit a deer and totalled his pick up, then a week later cut off half of his thumb in an accident at work. So, good things, bad things, crazy things. I realize my life is never going to be calm, but I just couldn’t sit at the computer and fight with it. It still takes me so long on this dang thing. I’m too “old school”.

But it’s a new day. Time for a new commitment. TIme to get back to blogging. I have so many fun things to share.

I am SOOO busy right now making things for our Christmas Open House coming up (I know…. horrible to talk about Christmas already, but if you are crafty… you get me…) I thought you would like to see some of the things I have been working on.

I am going to take some quick pictures and give you a sneak peak, and this is my promise to you… I will stay in touch. I will get back in the habit of blogging at least once a week. Thank you for not giving up on me.

Valentine Mug Rug

This very quick Mug Rug does double duty. It is lovely as a special mat for your beverage and snack….IMG_2015[1]and if you wrap it around a cupIMG_2014[1]and tie with a pretty bow and it becomes a cute little gift toting present!IMG_2013[1]Millie gave me a gift similar to this a few months ago and I thought I would share the idea with you!

It was so simple to make. I started by drawing an 8″ x 8″ heart onto a piece of fusible batting. IMG_1989[1]Then cut out the heart and fuse it to the wrong side of a piece of pink fabric.IMG_1990[1]Cut out around the batting. This will be the backing.


For the front, piece to fabrics, 4 1/2″ x 8″ togetherIMG_1988[1]and repeat with batting and cut the front heart out. To finish I layer the two hearts together, RST and sew around the edge, leaving an opening for turning, then top stitch about 1/8″ all the way around to close the opening and give a nice edge.

Have fun with this cute little double duty mug rug! And Happy Valentine’s Day!!

Mystery Revealed!

It’s finally time to put all of your blocks together!

This quilt is actually pretty versatile. The half log cabin blocks, star blocks and the Jacobs Ladder blocks are all the same size and the last block we made was the equivalent of two blocks sewn together, so this means the blocks can be moved around to create several options.  This is my finished quilt:
IMG_1953[1]I went around the center with the half log cabin blocks, then arranged the stars to fill out the pattern, and used the Jacob’s ladder blocks as a border. It finished 72″ x 90″. I am going to add a 5″ border all around, and end up with a full sized quilt.

We used Charisma’s blocks to arrange in some of the other patterns described below. She has a very scrappy quilt… it is going to be beautiful!

Here’s the first one:IMG_1955[1]This layout is quite different.  For my quilt I used the half log cabins with the light on the inside, but this one has the light on the outside. Then the Jacob’s ladder, then it will fill out with the stars.

Here is the next one:IMG_1956[1]I took the half log cabin blocks and arranged them like a star. (Remember you have “left” and “right” half log cabins). Then we did a row of stars, then a row of jacob’s ladder blocks. We will fill this in with three stars in each corner, then use the rest of the half log cabin blocks as a border (pictured below… ignore the center…. )IMG_1962[1]Here is the forth option:IMG_1959[1]I used the same star layout as above, then extended it for another row. It was filled in with the stars, then I will use the Jacob’s ladder blocks as a borderIMG_1960[1]This option will finish 72″ x 72″, you would end up with a few leftover blocks.

So use these pictures to arrange your quilt in the way you find most pleasing. Or maybe you can come up with another option? If so, please send us a picture!

Thanks for quilting along with me! This has been fun!


Quick Coaster

Brianna and I are crazed with Seahawks obsession!

I am working on a cool purse from a t-shirt; and I’ve made a pillow,  a snack mat and a bunch of these super quick coasters. Brianna made a b-e-a-u-tiful coffee cozy with a free downloadable embroidery pattern that she digitized. You can find her post at beyondthe patches.wordpress.com. If I was a little more clever I could link it for you.So sorry.

It’s good to have lots of good options for fun hostess gifts if you’re watching the game at a friends house. You can take the Chicken Wing Dip, and a handmade Seahawk gift!!

So for these coasters, they seriously take just 5 – 10 minutes each. Crazy fast. You start with the round craftex coaster blanks. They come in a package of 6 for $5.49. They are made from craftex and fusible on both sides.

You will also need two 5″ squares of dark blue fabric and a tiny bit of Seahawk Green. I drew a simple 12 and reversed it. Trace the 12 onto fusible web and iron it onto the green. Cut the numbers out and set aside for a moment. IMG_1946[1]Now prepare the base. Just iron one of the blues on, and cut around the edge.IMG_1947[1]Iron the 12 in place, satin stitch around it. Iron the other piece of blue on the back then sitch around the outside edge. That’s it! Repeat for a few more!IMG_1948[1]

Snack Mat #6

So I thought a mug on my mug rug would be fun! I just couldn’t decide what my mug should look like…  First I drew a normal mugIMG_1933[1]I liked it and cleaned up the image a bit so I could add it to the pattern (at the bottom of the page), but I really wanted to do something less traditional so I drew an odd “spilling” mug.IMG_1934[1]You can make either one (or both), the best part is to choosing your mug color (I found some very cool fabric that I thought happened to be Seahawk colors…)IMG_1936[1]Trace the pattern pieces onto fusible web using the downloadable pattern, iron to the wrong side of the fabrics, then cut out on the line and position onto the background of choice. I prepare the background by fusing it and wrapping it around a 5″ x 7″ piece of craftex. You can use batting, timtex, or combinations.IMG_1939[1]Press well.IMG_1941[1]Now it’s ready to stitch. I really like scribble stitches, but for this one I decided to use the basic satin stitch. I begin by taking out my “stitch guide”, which is just a small piece of muslin that has the various measurements of my zigzag stitch in width and length.IMG_1942[1]I find this is a far better visual when I am trying to choose the size of my stitch. There is nothing worse than testing… testing… testing… wider… thicker…before you decide.

After I choose my thread and stitch around all of the edges with my 2.0w and .30 length, it is time to prepare the back (just like the front)IMG_1943[1]Just press and wrap around the edge, then layer the two so I can stitch them togetherIMG_1944[1]I added a satin stitch around the edge since the background was so light. And that was that! Pretty quick. I am making the traditional mug also, I am just waiting for Brianna to embroider “Go Hawks” on my fabric so it will look like I have a Seahawks mug on my mug rug! I can’t wait to set them all on the table next to the wings and nachos this Sunday!

Here is a downloadable pdf of the pattern: Snackmat #6 if you’d like it.

Final Step for Mystery Quilt

This is our last block. I know most of you may be out of fabric, so you might have figured out you will just need to make one. It will be a center block that measures 18 1/2″ x 18 1/2″, then all of the other blocks we’ve made will go around it. In just five days I will show you how everything goes together to finish your gorgeous quilt!! The best part… lots of options!

This is a simple block. You start with a nine patch.IMG_1877[1]You need a 5″ x 5″ center square, four 2 3/4″ x 5″ rectangles and the corner blocks should contrast, cut them to measure 2 3/4″ x 2 3/4″. If you’d like, you can go ahead and sew this unit together and press. This square should measure 9 1/2″ x 9 1/2″.

But a really nice option if you want something a little more exciting: make the rectangles into flying geese by adding 2 3/4″ squares of background to the rectangles:IMG_1878[1]Draw a line on the diagonal, sew on that line. Trim seam allowance to 1/4″. Press, and repeat on the other side.
IMG_1880[1]IMG_1881[1]IMG_1882[1]If you choose this option, make all four rectangles flying geese units.

The next step is to make a big and somewhat unusual flying geese unit with a strip set (you may want to read on then come back). This in an interesting technique because it finishes the contrasting squares so they circle in your block.

You start with your strip set. You will need a 2 3/4″ x WOF strip of the same high contrast used in the corners of the nine patch, and a 2 3/4 x WOF strip of another print (preferably dark). Stitch together lengthwise, then press.

Next find your last bit of background fabric and cut into four squares that measure 5″ x 5″ and four rectangles that measure 5″ x 9 1/2″.IMG_1883[1]Now cut the pressed strip into eight 5″ squares. Place one of these 5″ squares on top of the background rectangle with the contrasting piece North and the dark piece South (I hope that makes sense, sometimes I find that saying “up and down” or “top and bottom” can be confusing when you are sewing. IMG_1884[1]After you lay this out, draw your line on the diagonal, and sew DIRECTLY ON that line, then trim seam to 1/4″ and press. Repeat with the other side, be sure to lay your contrasting piece “North”.IMG_1885[1]Repeat the sewing on the diagonal line, trim seams to 1/4″, press. The flying geese unit should look like this:IMG_1886[1]Make four.

Then lay out your new flying geese units, the corner squares and you pieced nine patch to make one big nine patch. Sew together and press. Your block should measure 18 1/2″ x 18 1/2″.IMG_1887[1]Super cool! This is your last block!! I will show you the completion options in five days!!

Gliche!

Not sure exactly what happened with my blog… I can only assume user error… but the last three posts did not post. Thank you Betty for bringing this to my attention!

So instead of all three posting today, they are scheduled to post every other day. Last mystery step today, January Mug Rug Wednesday and Mystery quilt layout on Friday.

Sorry for the trouble, but me and computers…sheesh!

Back to work!

It’s a brand new year!! Thank goodness!! I am almost caught up from my month of being stressed out and “checked out”. It is terrible to be non-functional when you have year end business things to do, I am on my third office day and I’m starting to feel like I may catch up this month! Whew!

Thank you for all of your well wishes. Things are good. I am going to have two surgeries this spring, but they are more prevention than treatment. I should have had a different surgery two years ago but I didn’t like the plastic surgeon they sent me to and I couldn’t cope with the idea of traveling to Seattle.  Now it is time to take care of things. I’m definitely ready, and tired of being freaked out by bad mammograms.

Christmas was so great. We went up to the woods. Lots of snow, crackling fire, family, pinochle and no cell phones or internet. I did get a bit of stitching done, but not enough to be ready for any classes this month…. like a rebel I worked on my own things, not class things. Such a bad girl… I deserve my sleepless nights!

This is one of my Bird Dance blocks. Fun BOM, we are doing three birds/month. All in wool with terrific stitches, Sue Spargo Style!IMG_1660[1]


Then our Prairie Women Group got together for a Christmas gift exchange. We each brought a mug/cup with a matching mug rug then swapped ‘White Elephant’ style. Super fun.IMG_1754[1]Speaking of mugs… this is a mug I got from Brittany and Jordan, I LOVE it! And the little dude in the cup was from Brianna, he is a tea steeper. I put loose leaf tea in his pants. Hilarious!IMG_1833[1]He makes me laugh!

The picture at the top of the page was one of our recent retreats at the retreat house. We had a blast. Such a fun group! We scheduled two more retreats, one for January and one for February, they were both filled up in two hours. We set out the newsletter at our sale on the 1st and it was a done deal! That day we emptied 176 bolts in four hours! Good job! Bring in the New Year with new fabric!

Well, that’s a super quick rundown of everything I can remember from December (about 2% of everything that happened…). I do have the last block for the mystery all done, I will work on editing that post and send it out tonight. Then we can get that gorgeous thing finished up!! I have a mug rug done for January, I just need to take some pictures and type that up. I think I can get that done on Friday.

Thanks for hanging out with me. Stay warm and finish up those UFO’s while we’re stuck inside! Send me pics of what you are working on!

Dodged a bullet….

It has been 6 weeks since my last post. I think the last step of my Mystery Quilt is about 4 weeks overdue. I am sorry. I have had a secret… but now I can share.

Right after Thanksgiving I had a bad mammogram. I am only 2 years post mastectomy/radiation/chemo and a bad mammogram is more than a little concerning. The bad mammo was followed by a bad ultrasound.

I was not ready for the surgery again (which this time would have to be far more invasive) or the radiation (the old burn scars are still sore) or the chemo therapy (at the moment the only physical attribute that I find is decent is my hair)… so I checked out just a little. Ok, I checked out a lot. I found I had a very hard time concentrating, and even when I tried, I couldn’t focus at all. I was in this weird “nesting” mode. I kept thinking about all of the time I spent on my couch looking at dust bunnies and wishing I had the energy to do something about them. I was fully believing I was going to be in surgery this week, and recuperating next week, then starting treatment right after the first of the year.

The last thing I was thinking about was blog posts, class samples and the next quarter newsletter. The second to the last thing I was thinking about was Christmas gifts.

I did manage to get the Christmas open house, 12 days of Christmas and two events completed, but thank God for Brianna and a great staff. I’m sure they were all wondering what exactly was in my coffee…

Well, the good news… all is well. I kept it a secret because I wasn’t sure what all was going to happen. As it turns out,  I have a mastitis (infection) with significant inflammation, but apparently, no new cancer cells. The bad news… I am not ready for Christmas or my final Mystery step. I thought no one would hold it against me if I was sick. Now that I’m not sick… I am just hoping you are all so busy with Christmas yourself… that you didn’t even miss me.

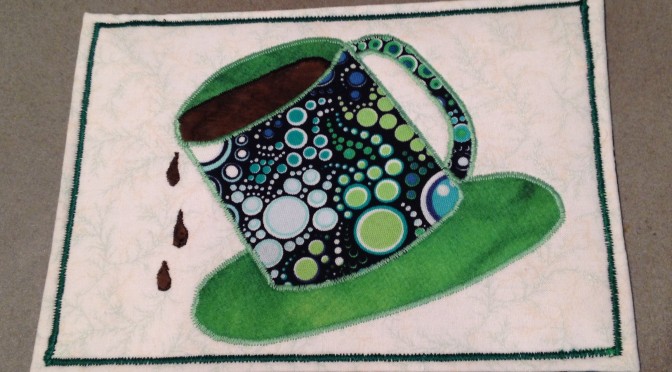
I do apologize. I didn’t even get a Christmas mug rug done.

In about 20 minutes Brianna and I are taking off to the cabin to join everyone else for our week of Christmas vacation up on the mountain. I am really looking forward to it (ready or not). The rest, calm and peace will be so necessary and appreciated. No phone, no internet, no last minute shopping. Just family, pinochle, reading and stitching.

I promise to come back with a better head. I will get your last step sewn, typed and posted and I will be back on track with the other fun things I was planning before I retreated into the dark recesses of my brain.

I hope all of you have a very Merry Christmas! Enjoy your family and remember it’s not about the presents, it’s about the presence.

Back Road Journal

Little treasures discovered while exploring the back roads of life

NewEnglandGardenAndThread

Master Gardener, amateur photographer, quilter, NH native, and sometimes SC snowbird

Beyond the Patch

Young Professional and Young Arm Quilter